

How to Download War Thunder on PC: A Step-by-Step Guide
If you’re a fan of combat simulation games, you might have heard of War Thunder. This exciting and action-packed game lets players engage in thrilling battles across air, land, and sea. Ready to join the action? This guide will show you exactly how to download War Thunder on your PC step by step.
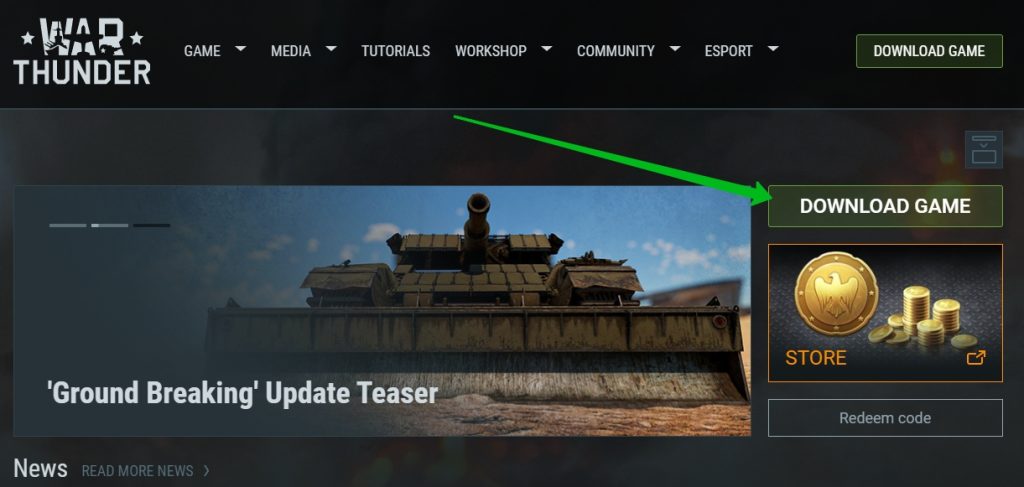
Step 1: Visit the Official War Thunder Website to Start Your Download
To begin, open your preferred web browser and navigate to the War Thunder Official Website. Once you’re on the homepage, look for the prominent « DOWNLOAD GAME » button—usually highlighted in red or bold for easy visibility. Click on it to proceed.
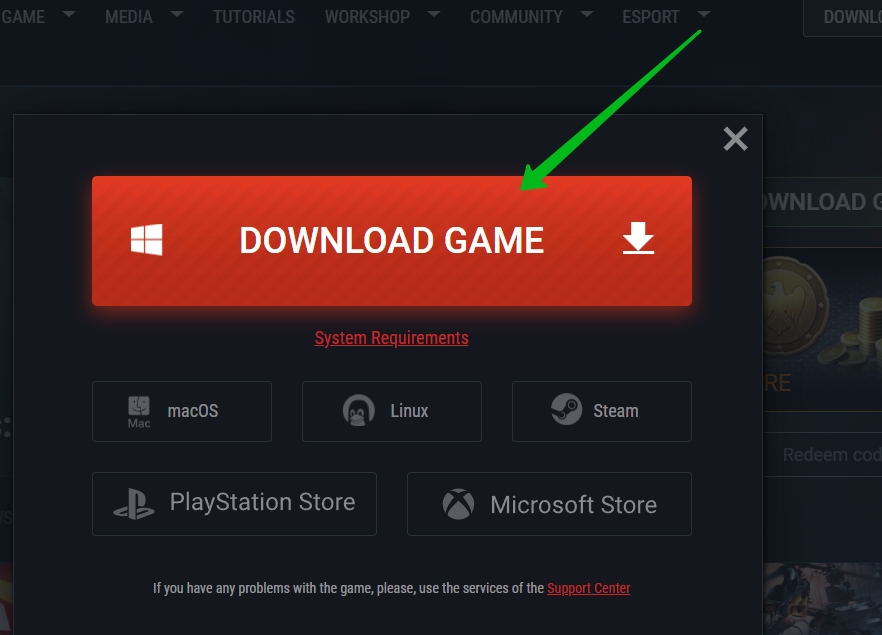
Step 2: Download the War Thunder Installation File on Your PC
After clicking the download button, your browser will prompt you to save the installation file. Choose a location (like your desktop or downloads folder) and wait for the download to complete.
Once downloaded, locate the file and double-click it to run the installer. A setup window will appear asking you to select your preferred language—choose one and click « Next. »
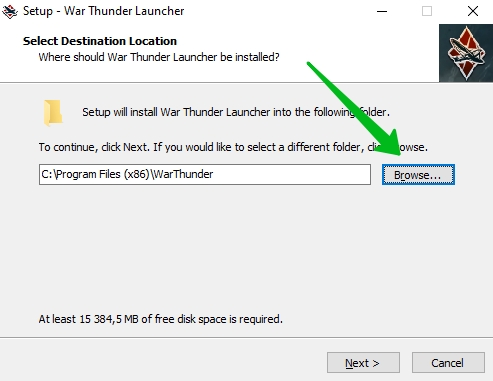
Step 3: Select a Location to Install War Thunder on Your PC
In this step, you’ll be prompted to choose where the game files will be stored. The installer will suggest a default location, but you can select a custom directory if needed. Ensure that the chosen drive has enough free space for the game files before continuing.
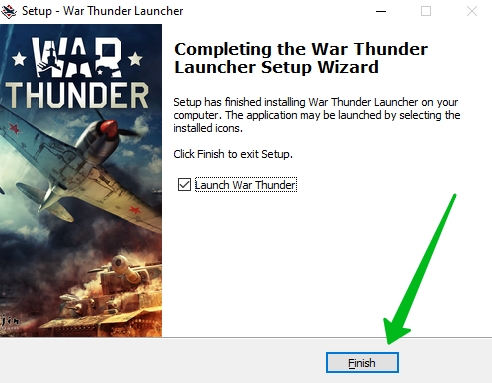
Step 4: Install the War Thunder Launcher for PC Gameplay
After confirming the installation location, the setup will install the War Thunder Launcher on your PC. Once the process is complete, click « Finish » to exit the installer. The launcher will open automatically and begin downloading the core game files.
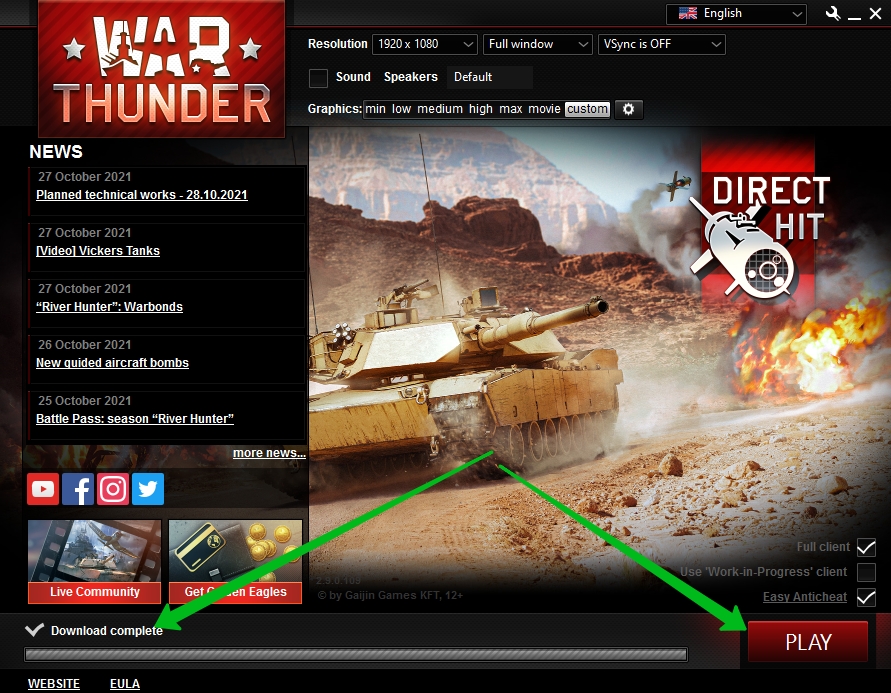
Step 5: Download War Thunder Game Files and Get Ready to Play
This step involves the launcher downloading the necessary files for gameplay. Depending on your internet speed, this could take anywhere from a few minutes to a couple of hours.
Pro Tip: Make sure your PC stays powered on and connected to the internet throughout this process. Interruptions might result in errors that could require restarting the download.
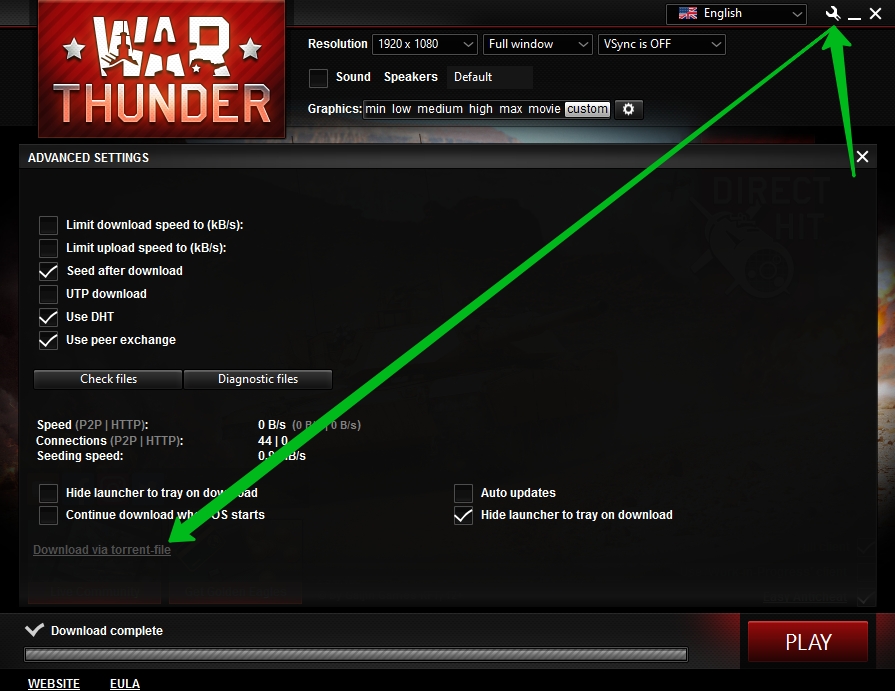
Step 6: Use Torrent Options to Download War Thunder Faster
If your internet connection is slow or unstable, you can download the game via a torrent client. On the official website, look for the option to download the .torrent file. Open this file with a trusted torrent client like qBittorrent or uTorrent.
This method can be more reliable for larger downloads, as torrents allow resuming interrupted downloads seamlessly.
Step 7: Finalize Installation and Start Playing
Once the launcher completes downloading the game files, you’re ready to go! You can now log into your account or create a new one if you’re a first-time player. From here, dive into epic battles, explore various vehicles, and test your strategic skills across different modes.
Conclusion
Downloading and installing War Thunder on your PC is a breeze if you follow these steps. Whether you opt for the direct download or use a torrent client, the process is straightforward.
Once installed, get ready to immerse yourself in the exhilarating world of combat simulation. Don’t forget to check the official website for updates, tips, and events to enhance your gaming experience.
Happy gaming, and may your battles be legendary! 🎮